Resizing sounds like the simplest thing an image tool can do. One line of code does it:
ctx.drawImage(image, 0, 0, width, height)
That line is what the Image Resizer used to be built on, and it is what almost every browser-based resizer is still built on. It works. It is also wrong in three specific ways, and one of them is wrong in a way you can measure.
What Downscaling Actually Is
Going from a 4032×3024 photo to a 1080×1080 square means roughly nine source pixels have to become one. The only question that matters is which nine, and how you combine them.
Combine too few and you get aliasing: the detail you skipped does not vanish, it comes back as a pattern that was never in the photo. Moiré on fabric and brickwork, shimmer on foliage, stair-stepping on text. Combine them with the wrong arithmetic and you get something subtler, which is where this gets interesting.
The Measurable Bug: Averaging in the Wrong Space
sRGB — the numbers in every ordinary image file — is not proportional to light. It is deliberately curved, so that the 256 available steps are spread the way human vision notices them rather than the way a photon counter would. A pixel value of 128 is not half as much light as 255. It is about 22%.
This matters the moment you average two pixels. Averaging a black pixel (0) and a white one (255) in sRGB gives 128 — which is about 22% of the light, not the 50% that physically landed on those two pixels. Every average taken directly on sRGB values comes out too dark, and downscaling is nothing but millions of averages.
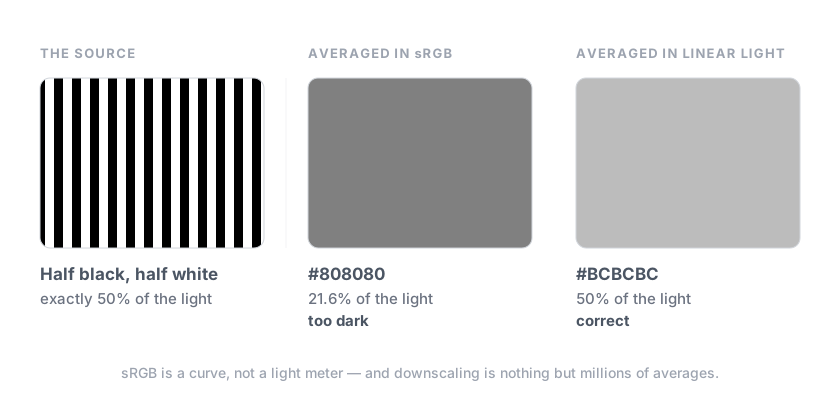
The correct procedure is to undo the curve, average in linear light, and reapply the curve. Here is what that is worth, measured on a high-contrast test pattern by comparing mean luminance in linear light before and after a 4096px → 1080px downscale:
| Method | Brightness error |
|---|---|
drawImage, default smoothing | −1.6% |
drawImage, imageSmoothingQuality: 'high' | −11.3% |
| Lanczos3 in linear light | +1.3% |
Look at the middle row, because it is the counter-intuitive one. Turning the browser's smoothing up to 'high' makes the filtering better — it samples many more source pixels, which is exactly what you want — and in doing so makes the brightness error dramatically worse, because every one of those extra samples is averaged in the wrong space. Better filtering, more averaging, more error.
On ordinary photographic content the effect is milder, but it still runs the same direction:
| Method | Brightness error | Round-trip detail (PSNR) |
|---|---|---|
drawImage, default | −1.14% | 29.96 dB |
drawImage, 'high' | −1.19% | 29.47 dB |
| Lanczos3 in linear light | −0.83% | 30.51 dB |
The detail figure is a round trip: downscale, scale back up, and compare against the original. A filter that threw away real detail scores badly, and so does one that invented false detail through aliasing.
An honest note on that second column: the gains here are real but modest — about half a decibel over what the tool did before. If you were promised that a better resampling filter would visibly transform your holiday photos, it will not. What it reliably does is stop introducing errors, and on high-contrast material — screenshots, charts, logos, anything with hard edges — the difference is much larger than on a landscape.
The Filter
The other half of the change is which pixels get combined at all.
drawImage does not tell you what filter it uses, and the answer varies by browser and by the imageSmoothingQuality hint. Lanczos3 is a specific, defined thing: a sinc function windowed to three lobes, which means every output pixel is a weighted sum of a proper neighbourhood of source pixels, with the weights following the mathematically correct reconstruction curve rather than a convenient approximation of it.
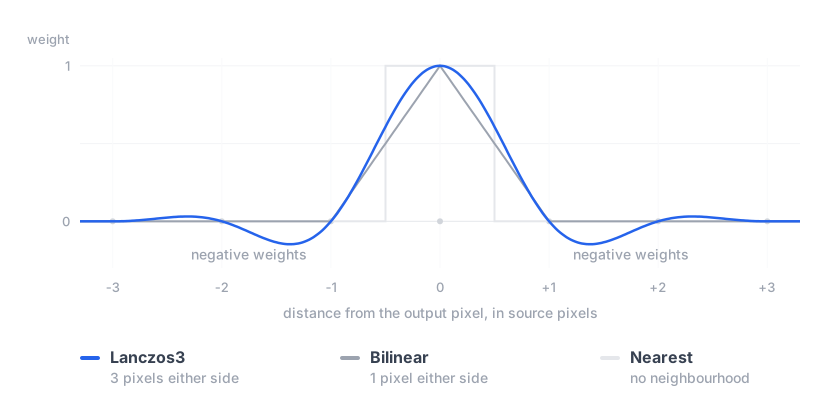
It is not magic, and it is not free of artefacts — a sharp filter like Lanczos rings slightly at hard edges, which is the price of its sharpness. It is, however, predictable, identical in every browser, and the same filter professional imaging tools reach for.
There is one more detail that matters for images with transparency: alpha has to be premultiplied before averaging. Skip it and the invisible colour stored in fully transparent pixels gets averaged into its visible neighbours, leaving a faint halo around every cut-out edge — a classic and very common bug in resized logos.
The Input Problem
The third flaw in drawImage has nothing to do with quality. It can only resize images the browser can already decode, which excludes the single most common photo format an iPhone produces.
The resizer now decodes through the same pipeline as the Image Converter, so it reads:
PNG, JPG, WebP, GIF, BMP, SVG, AVIF, ICO, HEIC, TIFF and JPEG XL.
HEIC is decoded by libheif compiled to WebAssembly, TIFF in JavaScript, JPEG XL by libjxl — all inside the tab, none of it uploaded. An iPhone photo can now go straight from the camera roll to an Instagram square without a conversion step in between.
The Output Side
Output picked up WebP alongside PNG and JPG, and it is worth knowing what that is worth. The same 1080×1080 crop, written three ways:
| Format | Size |
|---|---|
| PNG | 784 KB |
| JPG | 88 KB |
| WebP | 36 KB |
WebP is lossy like JPG but keeps transparency like PNG, and every current browser displays it. For anything destined for a web page it is close to a free win.
Crop Before You Resample
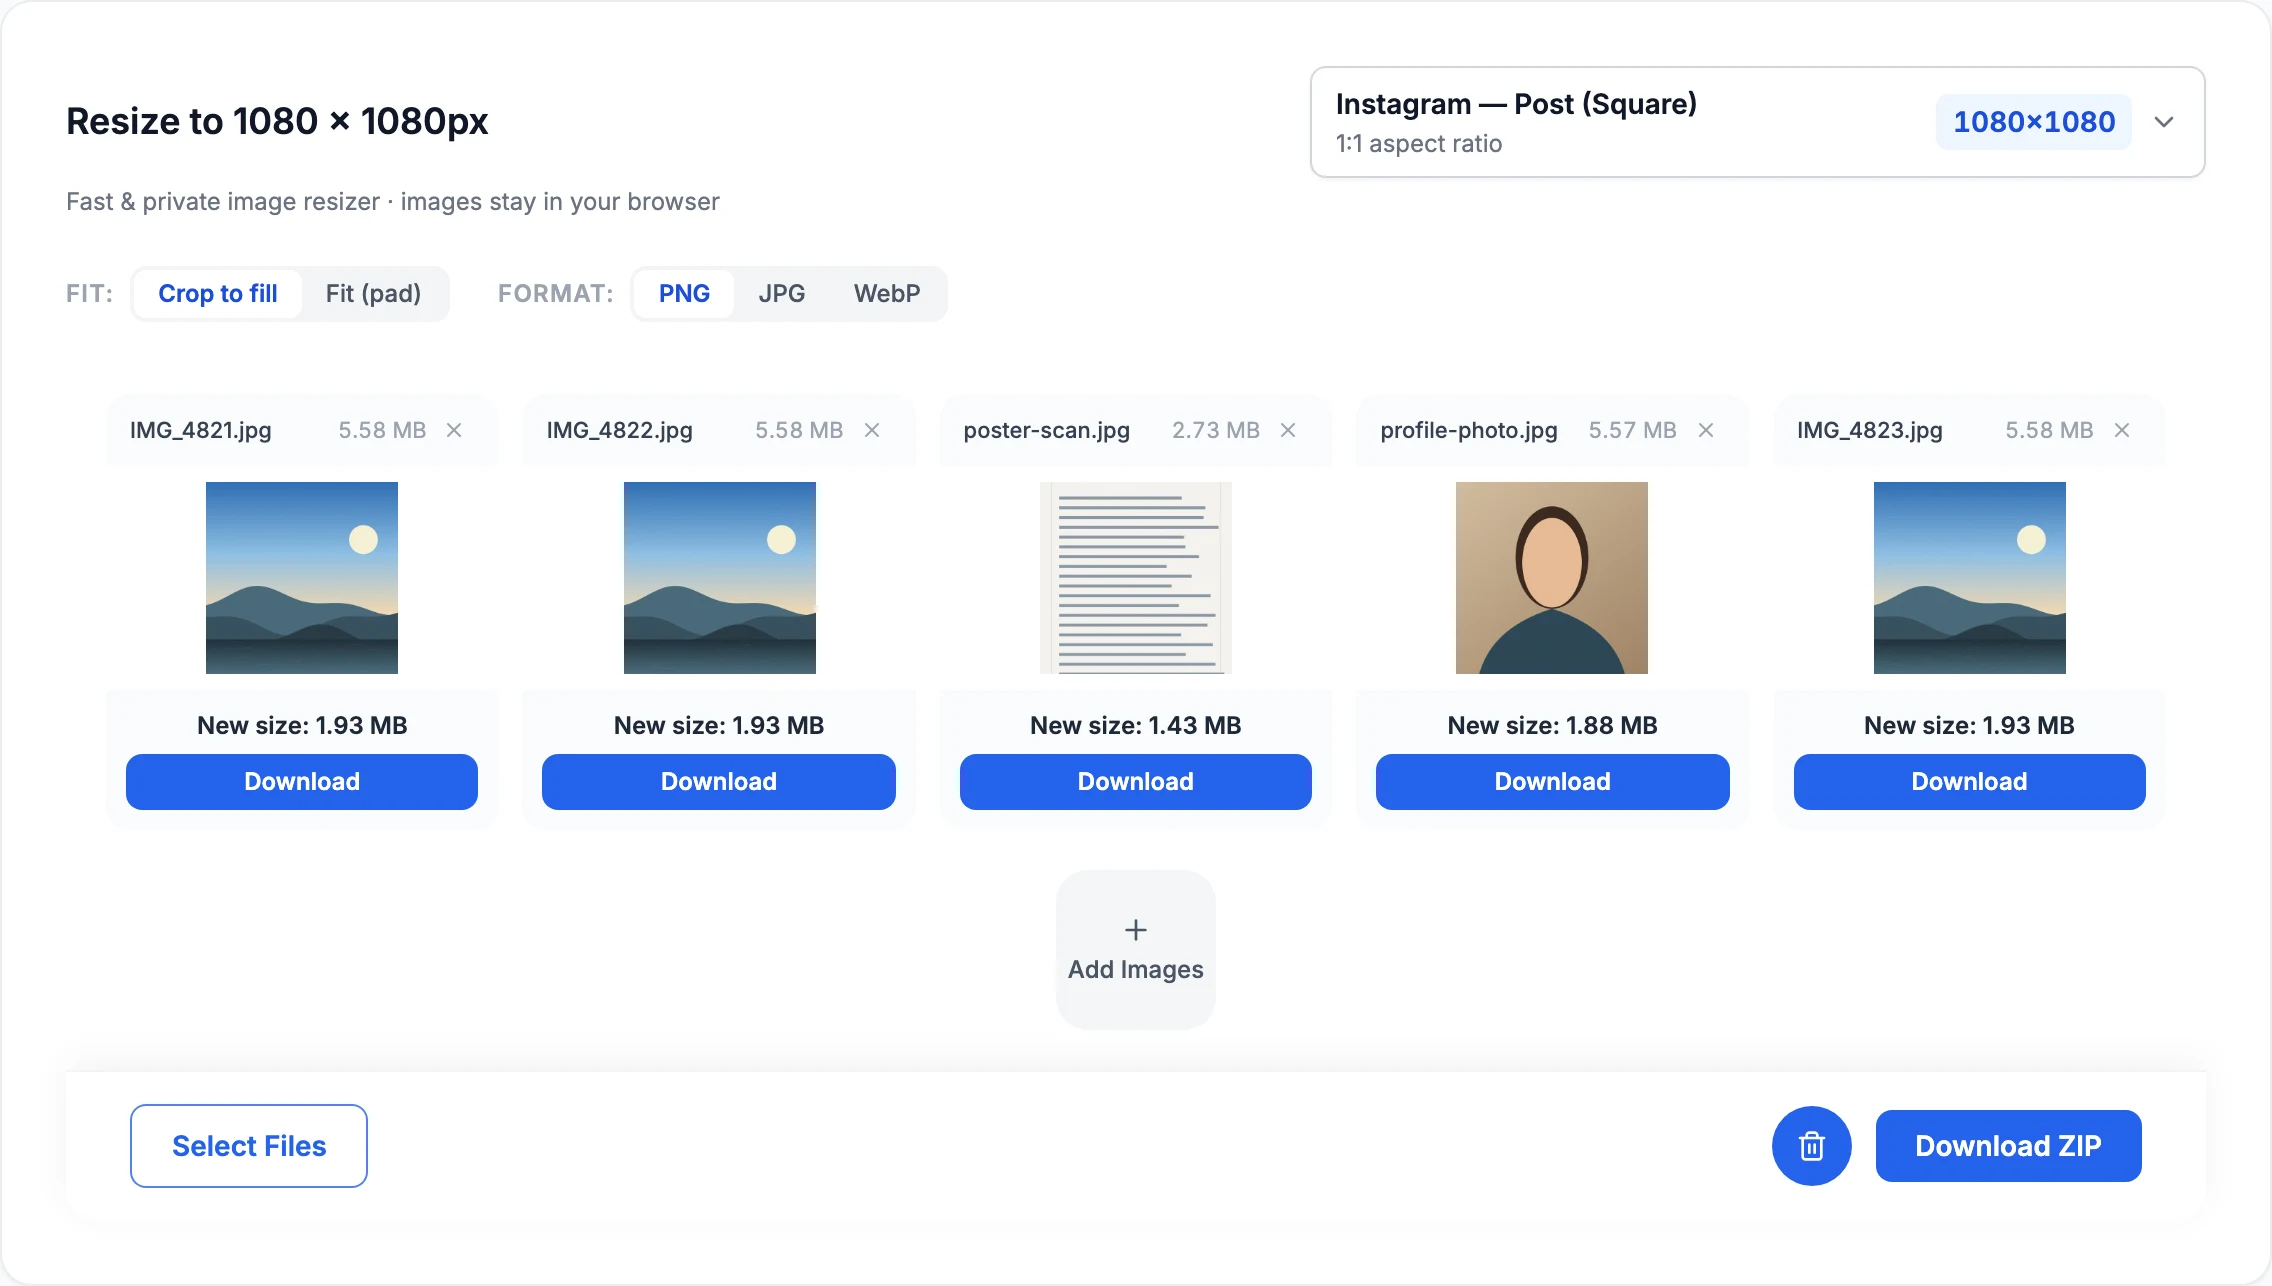
"Crop to fill" takes the largest centred rectangle matching your target's aspect ratio. The order of operations matters more than it looks: the crop happens on raw pixels before the resampling, not after. If you resample first, the filter spends part of its weight on pixels that are about to be thrown away, and the edges of what survives are subtly softer for no reason.
"Fit (pad)" does the reverse — the whole image is scaled to fit inside the frame and the margin is filled in. Transparent for formats with an alpha channel, white for the ones without, because JPEG has no way to store "nothing here" and would otherwise give you a black border.
Where the Work Happens
Resampling a 12-megapixel photo is real arithmetic — about 340ms in our measurements. That runs in a Web Worker, so the page keeps painting at full frame rate while it happens, which is the difference between a tool that feels responsive and one that freezes when you drop eight photos on it.
The honest cost accounting, for a 12MP JPEG going to a 1080×1080 JPG:
| Time | |
|---|---|
Old pipeline (drawImage on the main thread) | ~1070 ms |
| New pipeline (decode → Lanczos3 in a worker → encode) | ~1470 ms |
About 400ms more per photo, and the expensive part no longer blocks the interface. That is the trade: a little more total time, spent correctly, off the thread that matters.
If the WebAssembly resampler cannot load — a blocked fetch, a strict corporate proxy, an old browser — the tool falls back to the canvas path automatically. It gets slightly worse. It does not break.
Nothing Is Uploaded
Same as every other tool here, and same as before: open your browser's Network panel while you resize something. You will see codecs being fetched the first time, and after that, nothing. There is no endpoint that receives your image, which is why it keeps working with your Wi-Fi switched off.
Try it on the Image Resizer, or jump to a preset: Instagram post, Instagram story, or YouTube thumbnail.